
Showing posts with label freezing. Show all posts

Sunday, October 16, 2011

how to freeze kale


Six kale plants.
A six-pack of kale starts will run you about $2.50. Kick in a little more for a bag of compost and you're on your way.
Those six plants can be packed into a tiny garden bed in the spring. Nurtured. Watered. Even sung to, if that is how you roll.
They will start to feed you by the end of May, in little fits and starts of delicate, baby kale. Any by July, you will have trees, a jungle of green leaves that grow faster than you can eat them.
But that's not even the best part.
Because long after the rest of everything has frozen and withered away, there is the kale.
It is better after the frost, sweeter and worthy of eating it raw, even if you're not the kind of person who does that kind of thing.
And, depending on the strength of the winter, the kale will feed you long after the world has bundled into its cold envelope, and you can trudge out through the deep snow to pick a few leaves for dinner. Even if it feels frozen, it will warm on the counter after a few minutes, perky and ready as it was in October. And after that? There has been extra all along, enough to freeze in little bags to get you through February, March, and April. Powerful stuff, this kale.


I've been thinking about revolution lately. A withered word in itself, I think, and sometimes I wish that I'd been there to make a difference in the decades before I was born, back when revolution was revolutionary. Back when there just seemed to be more conviction in the power of revolution.

A year and a half ago, when I decided to run for office in my little town, I was sick of feeling like I couldn't make a difference. I felt fed up with apathy and anger, and I decided that I would strike out and do something I had never considered. I would participate.

I'm not sure that the experiment has entirely been a success. Most days when I walk out of meetings at town hall, I feel less empowered and more hopeless than I ever did before. I feel like there is such a divide between people and government, and I somehow I feel it more profoundly from this side, the government side. Local government and national government are different enough that it's hard to make accurate comparisons, but in someways, I think the comparison is fair. And this divide between the people and government? It undermines democracy itself. If the people don't participate, there really is no democracy.


But I'm still plugging along. And I think, in the end, that participation really does create change. I think that the decision to be there, to go to a local town meeting, to run for office, to write to your representative, to stand on the street in New York or just your own home town and to say what you think--I think that each one of these actions strengthens democracy and (depending on how you feel about the present state of things) brings it back to life.

Which brings me back to kale.
Six plants. $2.50. If you've got a tiny bit of space and you're thinking about turning it into food, I'd start there. And every time you take your food production into your own hands, you are participating. If you believe you can make change, it's a self-fulfilling prophesy.

This is my mom, Jamie, and my stepfather, Chris. Last weekend, I was heading out for the day, and they offered to demonstrate (for you!) how to freeze kale.

They asked for a quick refresher on the method, and so before I left, we went through one batch. They put on some Steely Dan, and I took that as my cue to get out of the kitchen.


And so, (with thanks to Chris and Jamie for documenting the experience),

HOW TO FREEZE KALE
(or, revolutionary food preservation)

1. Soak the kale in the sink to remove dirt and bugs.

2. Take the leaves off the stem by holding the stem at the base and running your hand up the length of the stem. Chop the leaves roughly.
3. Bring a large pot of water to boil.  Set up a large bowl of ice water on the counter. Next to it, put a large colander inside a pot or bowl.


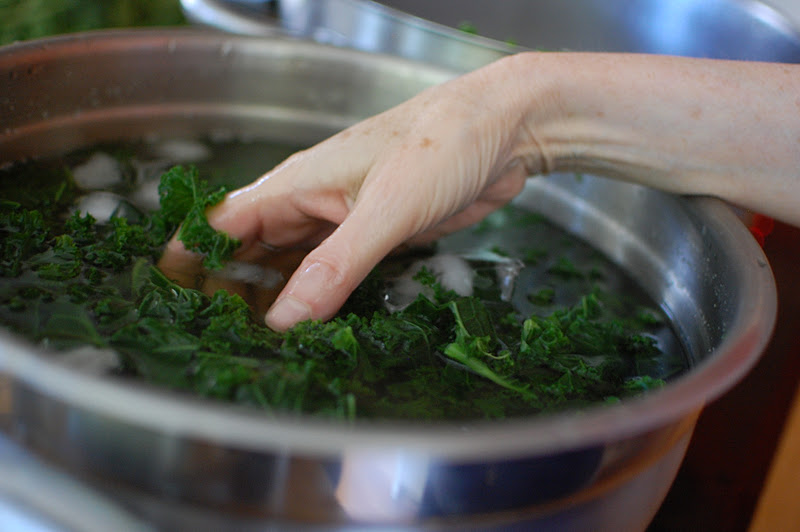
4. In batches suited to the size of your pot, submerge the kale in the boiling water for 30 seconds.


5. Use tongs or a slotted spoon to transfer the kale to the ice water. Keep it in there for a few minutes, or until it is fully cooled. Replenish the ice as you go, so that the water stays cold.
 

6. Then, transfer to the colander, gently squeezing the water out as you do so.

6. Transfer the kale to small freezer bags. Press the air out, seal, and flatten out the contents so they will stack nicely in the freezer.

Use in soups all winter. You can defrost first, or just stick a kale-sicle in a pot of soup as it cooks.

Monday, August 15, 2011

how to freeze corn

Joey was supposed to take the girls camping, and they've stuck around after all.  After changing his mind over and over for 24 hours, obsessively checking the weather on the internet in a fashion that rivaled my own, he put the tent back in the basement.  Up till the very end he thought perhaps they would rough it, he thought that a long stretch stuck in the tent next to the stormy ocean would be adventurous and somewhat thrilling, and then when the forecast turned to 100% rain mixed with the occasional thunder storm, he couldn't lie to himself any longer. 

 
I'm relieved, because of course I love them, and I'm glad to have them home and all that. But really, honestly, I just don't know how I would have shucked all this corn by myself.


I had come into the lucky fortune of 80 ears of sweet corn, and my goal was to transform those guarded and husked pods of gold into freezer bags full of corn for the winter. Corn for burrito nights, for corn chowders and shepherds pies, corn for this dish that can perk us up on any February night. I was concerned that the girls would rebel, that they would take the exchange of camping with Daddy for corn husking with Mommy with sour disappointment, but they came through.


Rosie has recently inherited Maia's little ipod shuffle, and Maia loaded it up for her with Lady Gaga and Abba and all the music that she asks for.  Joey found these tiny speakers at the dollar store, and now Rosie walks around most days with the speakers in her pocket, singing through the house, in the garden, or on the swing that hangs from the tree out front. She grabbed the iPod and found some Lady Gaga, and while the rain poured all around the perimeter of the roof over our front walkway, those tiny speakers boomed (okay, actually tinkled) with music. Sadie and Maia industriously husked while Rosie cheered them on by picking up ears of corn and using them like microphones, swinging her hips and belting out the lyrics. Occasionally, when prodded by the other girls, she would actually husk the corn, and then a new ear would become her microphone.


Inside, Joey was listening to Herbie Hancock. He had the big pot of water going on the stove, the little sink filled with ice water.  We had a system going, and I'd walk the husked corn in to the kitchen and put it in the steaming pot. Joey would transfer it to the ice, and then he shucked the corn. All along, I kept messing up my verbs, and he'd remind me:

Husking takes the husk off.
Shucking takes the kernels off.

He used a little tool that I'd borrowed, an actual corn shucker. Pretty simple really, except that where a knife takes off most of the kernel and loses all that wonderful creamy juice, the shucker takes off the whole kernel. More corn. More cream. More delicious.


And so we worked like that, me going from Lady Gaga in the rain to Herbie Hancock in the steam. And when it was so dark outside that we couldn't see the corn, it was time for bed.


The girls each ate an ear of corn. Joey said he never wanted to see corn again. I filled the last freezer bag, and then we cleaned the corn off the floor.  I told the girls they would be rewarded for all their hard work with sweet corn through the winter.  They laughed at me, as if winter was just a story that I had made up.


How To Freeze Corn

1. Husk the corn. Remove as much silk as you can.
2. Bring a large pot of water to boil. Prepare a sink or tub with ice water. Have extra ice ready.
3. Boil the corn for about 1 minute. Then transfer directly to the ice water. Keep the corn in the ice water for at least 5 minutes, replacing the ice as it melts. You want to chill the corn all the way through the cob.
4. Shuck the corn, using a shucker or a knife.
5. Transfer the corn to freezer bags in quantities that make sense to you. I ended up with several 2-cup bags (good for most recipes), as well as a few 6-cup bags (corn chowder).
6. Flatten out each bag and stack. Transfer to the freezer.


Tuesday, October 26, 2010

on the chest freezer

No fall musings here--I'm all business today. It's seventy degrees out, and I've got that uncomfortable sweaty feeling when it's supposed to be colder. It might be warm today, but it will be winter very very soon. It's mad stash week for Fall Fest and so we're going to get right to the point.

Still thinking about that chest freezer? You know, that one that you eye at Sears every September when you just packed your freezer with so much tomato sauce that it's all going to fall on you the next time you need an ice cube?

Perhaps you have never thought about that chest freezer. Perhaps you're living space is filled with couches and beds and other nonessential furniture. "I have no space!" you say. "How can I get a chest freezer!" You have space, I tell you. Your children don't need a bedroom--they will gladly sleep on the couch in exchange for the fifty pounds of frozen strawberries they get to eat all winter. Do you put your cars in the garage? Let them rust. Make way for the freezer.

Okay, so the chest freezer isn't for everyone. But if you've been contemplating the purchase of one, I thought I'd get a little conversation going over here, a little dialogue on the freezer, if you will. House tours around here always end up in basement in front of our great white, and so I'll take this moment to answer some commonly asked questions.

What kind of freezer do you have?
I'm pretty sure that this is the one.

Wow! That's really big!
Yes, we share it with our friends Jen and Pete. They're farmers, and they fill their side up with frozen corn and spinach, and we fill up our side with lots and lots of meat. They're vegetarians, but it works out okay.

What about the energy use?
It uses about 500 kwh per year, which costs us about 50 bucks.

And why chest instead of upright?
To each her own. Chest freezers are more efficient, whereas upright freezers are easier to organize.

Speaking of organization, how does that work?
Joey made a beautiful diagram with all the different compartments of the freezer so that we could keep track of what was in there. Jen uses it--I never do. My side is a mess, but I still seem to be able to find what I'm looking for.

Why would I want a chest freezer?
Well, if you're a meat eater, start here. And vegetarian? How about here? Or here?

So, yes, defrosting takes a bit of foresight. But a bit of menu planning is good for us all, right? And should the world collapse around you, can feel sure that there will always be food in the house for dinner.

Yes! It's fall fest, so let's get talking! Anyone want to weigh in on the freezer question? How are you preserving all these fabulous foods for the long, cold, winter ahead?

Here's the line up....I'll add as the breaking mad stash news comes in!

Alison at Food2: Break Out the Stash

Kirsten at Food Network: Roasting Pumpkin Seeds


Liz at Healthy Eats: Mad Squash Stash


Michelle at Cooking Channel: Save Em' While You Can

Friday, March 13, 2009

The Great Tomato Debate: Solved and Resolved!

So, if you've been around here for a little while, you might remember the unbelievable and somewhat exciting mess that I made of many pounds of tomatoes last year. The question at hand was this: How does one successfully freeze a tomato? I'd had some failed attempts in the past that were horrible curdled tomato nastiness when I defrosted them, and I wanted to be one of those impressive people who has a great way of freezing tomatoes. So I choose the two most popular methods, and I decided to make an experiment of it in the interest of making myself a better and more impressive person. Just to recap, these are the two methods that I worked with.

1. I made really good tomato sauce- I deseeded and deskinned the tomatoes and everything. I did this late at night, cooked the sauce all night, and it was amazing. My recipe is here.
2. I quartered and slow roasted the tomatoes. I sprinkled with salt and pepper, put on a tray, and baked for a long time. I played with the time, but I always roasted the tomatoes at 400 degrees, for at least an hour, but up to 2 1/2 hours. Then I let them cool and put them into ziplocs.

Now as you can imagine, these two methods involve very different levels of work. So I did them both, put them away in the freezer, and waited patiently for the time when I absolutely needed to check the results.

And why would I need to freeze tomatoes? Because in February, the store plays a trick on us. Thinking that you will be too busy with your life to notice, they call this a tomato:

Yuck. Hard. Tasteless. Expensive. Worthless.
I know I'm being hard on them here, but have you bought one of these lately? I think, if anything, I'm being easy on these "tomatoes".

So yes, if we are to eat tomatoes in the winter, we must freeze the tomatoes. Or can, if you like, but that's a whole other blog post, and certainly not one you're getting out of me.

Are you dying with suspense? Ready for the answer? Get ready....

They both work really well! Do both!
The sauce stayed phenomenal, and the roasted tomatoes were so useful, I used them as I wold canned tomatoes.
So my suggestion is this- one day in late August/ early September when you're feeling like outdoing yourself and you have access to 20 or 30 pounds of tomatoes, make sauce. Then freeze it. But then, all through tomato season, roast tomatoes whenever you have a trays worth. Then you'll be totally set.
Of course, as resolved as I am at this moment, and as impressed as I feel with myself, you're always welcome to throw off my pride with a new method to try. Feel free to share.

Wednesday, September 10, 2008

the great tomato debate

For the second week in a row, as I was picking my farm share, I once again thought that it was a fabulous idea to purchase a box filled with 25 pounds of tomatoes that needed to be dealt with within the next 6 hours. No matter that I have had a rough time of freezing tomatoes. My eyes went all glassy and I probably mumbled something about food for the winter. And that is how I found myself making tomato sauce at 11:00 last night.
People make all sorts of claims on the freezability of tomatoes. All I know is the ways that I have tried have resulted in me defrosting curdled tomatoes with a texture of really old milk. So I'm trying it two ways this year. Last week's tomatoes I treated in the following manner:

Core and quarter the tomatoes. Spread on a parchment lined backing sheet. Sprinkle with salt and pepper, and fresh herbs and crushed garlic if you wish. Roast in a 400 degree oven until the tomatoes dry out, about an hour. If you have more time, roast in a 250 degree oven for two to four hours, and this will be a bit more superior. Cool and load into freezer bags. This is the method prescribed by my friend Elizabeth Keen of Indian Line Farm. And she certainly knows how to deal with an excess of tomatoes.

Last night (and nearly into the morning), however, I made sauce. And let it be known here that I have always been lazy with my tomato sauce. I don't tend to take the skins off, and I have never "coaxed the seeds out" as Alice Waters puts it. But last night, I did it all. And oh, the horror.


Yup, I really showed those tomatoes. Here is my recipe...

Ingredients:
25 pounds of tomatoes
4 White onions (I used fresh eating onions), diced
2 heads of garlic, diced
the leaves of 3 large stems of basil, roughly chopped
fresh oregano leaves (to taste)
3/4 cup really good olive oil
salt and pepper to taste

Set aside a large work area. Cut a small t in the bottom of each tomato (thank you Molly for this tip). Blanch the tomatoes in boiling water for about a minute, or until the skin starts to separate. Then drop in ice water for a moment. Peel off the skins.
Okay, here's the part where you make a big mess and stop wanting to ever see a tomato again.
Core and seed the skinless tomatoes. I did the majority of this work with my hands, but a knife will come in handy at times. Try to preserve as much of the meat as possible. And save whatever juice you can scoop up from the counter.
Get a very large pot. Heat the olive oil a bit, throw in the onions and then stir them around every so often for about 10 minutes, or until they are nice and shiny. Then add the garlic, then the tomatoes and juice. Gently boil for about 45 minutes, adding the herbs, salt and pepper along the way. Cover, then bring to a full boil. Don't take the lid off! Turn off the stove and finally fall into bed. Your sauce will stay sealed and sterile all night, and the flavors will meld. (Thank you Molly, again) In the morning, cook uncovered for another 30 minutes or so. Then, eith put some of the sauce in the blender for a few seconds, or better yet, use an immersion blender till it's blended but still chunky. Cool and freeze.

So those are the two methods. In a few months, we will revisit this issue, to see how they froze.

I can hardly bear the suspense...

Friday, September 5, 2008

Canning the Guilt

So I'm new to this whole putting up food for the winter idea. And although I am wildly enthusiastic about the process of food preservation, the reality is not always as perfect as I imagine. Warm, fabulous smelling kitchen, the rosy glow on my cheeks as my daughters and I stir jam together, then lining up the many colored jars with our own special sticker that we created together.
Maybe other people have this experience. But let me share my first jamming experience last summer: 40 pounds of quickly rotting blueberries needing to get canned right now, even though it is 105 degrees outside, the logistics of my kitchen preventing me from getting jars in and out of my canning pot, giving into my screaming children and letting them watch Mary Poppins...twice, well, let's just say that jam was extra salty from all of my tears.
So now I only can in other people's kitchens, and I made the very important purchase of a chest freezer. When I bought this freezer, I said, I will preserve everything.
Now it is September. And I am finding that I am having trouble keeping up with my own ambitions. But I keep on reminding myself that this is a process. Like gardening, I'll get more comfortable with it every year. So I'm trying really hard not to feel guilty that I have frozen no green beans! No corn! (yet). But I do have twenty or so jars of blueberry chili jam that I made with a friend in her spacious and beautiful kitchen far away from my children. I have a few bags of frozen peaches. And as of the last two days, I have roasted and frozen 25 lbs of tomatoes, and this makes me feel a lot better.