Showing posts with label spinach. Show all posts

Friday, May 13, 2011

at the market: the spinach recipe

"And what should I do with spinach?"

That was the question that I heard most at the market last weekend. Makes sense, considering that we had enough spinach on the table to feed a small country. Spinach lovers out there know that the possibilities are endless, but of course to answer that question, I start small, feel it out, try to assess which possibilities will make this one hungry person sing with spinach-induced joy, and if I can't get a read on them, I start out safe.

"saute it?"

On and off today I've been checking in with a workshop that Penny De Los Santos is teaching through creativeLIVE. She is an amazing photographer who works mostly for Saveur these days, but she is also one of those people whose passion is so infectious--to hear her talk just makes me want to take risks. She's teaching a three day workshop, and she invited people to make videos on why they would like to take her course (see my friend Nikki's lovely video here), and she chose 6 people to join her in a room in Seattle, but the rest of the world gets to participate too. Watch some if you can- any length of time with her is a gift.  My favorite thing she said today?

"Self-assign your dream assignment."

Yes!

And that brings me back to the farmers market.  Years ago now, the chance to work for Indian Line Farm at the market got me thinking about food in new ways, and it got me here, too. And I will never get sick of talking with people about how to cook spinach, at least I hope not. And whereas the basic sauteing if spinach with olive oil and garlic might be a standard for some, it is a new recipe for others. It is one of the things I love best about that place- do people ever ask how to cook a vegetable at the supermarket? I don't think so- they reach for what they know.  So I'm bringing the market back in here. It's all far too connected to keep the two worlds separate.

This week, let's saute some spinach.


Slice a clove or two of garlic, so that it is in whole little chips. Heat a few tablespoons of olive oil in a big saute pan.  Add the garlic, and cook until the tiniest bit of browning happens. Add a few handfuls of unchopped spinach (leave the stems on if its nice and fresh and not too big), adding more as it wilts and you can fit more in the pan.  Toss as you go- it will wilt quickly, then shuffle it around and add more to the pan. When all of the spinach is in the pan, add 1/4 cup milk. (This prevents the spinach from doing that strange thing where it makes you mouth feel numb.) Cover for about 10 seconds, then toss again and season with salt and pepper. The spinach will be just wilted- stop before it starts to brown. 

And for those who want to find new tricks for familiar vegetables, a few spinach inspirations around the web:

Winnie's baby spinach and violet salad with blue cheese

Joy's kale, spinach and pear smoothie

Heidi's spiced coconut spinach recipe

Jenna's spinach feta turkey burgers

Tuesday, September 21, 2010

Indian lentil soup with spinach, and a flatbread from my favorite food blogger

Don't you just love a party that never stops?
From one season into another, we just can't give it a rest. As that little chill pricks around your as of yet unscarved neck, summer fest is slowly shifting into fall fest. If this all keeps up, I predict we'll be searching for winter fest topics too...
"What is that green frozen cube in the back of my freezer?" week, or "Good thing citrus season is coming because I think my kids are going to get rickets soon" week, or better yet, "Let's make stew again since we can't get out of the door!" week
Ah winter. In time, in time. But, I'm happy to be celebrating the fall for now.

Happy Autumn, friends. Wrap your sweater around you and let's have a little chat about spinach.

On second thought, (as I do have my own ways of dancing around the issue) and although yes, yes, spinach is entirely conversation worthy on these crisp cuspy equinitox-ical days, really I'm just thinking about Laurie Colwin.

Oh Laurie Colwin, the voice that whispers between my heart and my belly. She's made her appearances here before of course, especially in those weeks after my heroic friend Janet handed me her beat up copy with tight lipped inhale and an excited squeak, but she's been coming back a lot lately. I'm so glad her books are little paperbacks that I can carry in my apron pocket. I'm not sure what I'd do without her.
I'd have to say that Laurie Colwin is my very favorite food blogger.

Of course, Laurie Colwin has not put hands to a keyboard since her death in 1992, and so she has no food blog nor ever has had a food blog that we can google or tweet about. There are no daily updates, no accounts of what she made for her daughter for dinner last night, and this is truly our loss. What we do have are two books, books that speak and sing and feed--her voice is so present, so real, so "come in to my kitchen and go sit at the counter with this bottle of wine while I cook a little something for us," that this...THIS...is why I write here- only so I can extend the same sort of invitation. Thank whoever might be looking out for me for these little books that never fail to remind me why I even try.

There are, I think at this point, as many food blogs out there as there are people who have both a kitchen and a computer. In my opinion, this is nothing short of wonderful. I can only imagine that most people wrote that scary and exhilarating first post that put them out there into the world out of desire to invite someone into their kitchen, and I think each one of those invitations is a move towards where we want to be. I myself like to have a bit of company in the kitchen, and unless one is relishing their (rarely found but often sought!) alone time in the kitchen, then I also think a a full kitchen is a happy one, even if the guests are eating their fill from the other side of the computer screen.
I am happy to be one of millions. I think that if we all invite each other into our kitchens, if we all talk about what we're going to make...then there might just be one hum of invitation- one open door...that's right friends, world peace through food blogging! (or at least many people with a clearer idea of what they'd like to make for dinner)

This invitation has been on my mind--this hum and whir of it all. Sometimes I forget where I fit in, and I need a little shove. I'll say it one more time, because sometimes gratitude bears repeating...Thank whoever might be looking out for me for these little books that never fail to remind me why I even try.

Today, I made Laurie Colwin's flatbread. And soup. Soup with lentils and coconut and spinach. The girls sit on that side of the table, although Rosie's not going to touch that soup. Joey's over there on that side, but there are two chairs in the corner and another over by the computer in the living room, and just bring those in. Oh, and there's a stool in the laundry room too, if you don't mind a chair without a back. Squeeze in the corner there- I'll get you a spoon.

Oh, and before I forget, (no no go ahead and eat!) I'm keeping my little giveaway open for a few more days. The conversation over there is just too lovely- I can't bear to end it. So feel free to chime in--at least go read the comments! I'll keep it open till Friday.

Look- new logo! Fall is really here. Soup and bread for everyone.

Indian Lentil Soup with Spinach
adapted from Padma Lakshmi, Tangy Tart Hot & Sweet

1 cup orange lentils
1 teaspoon salt, plus more to taste
4 cups spinach, steamed, chopped, and squeezed of excess water
2 dried ancho chiles
2 tablespoons yellow lentils (I couldn't find these and so used yellow split peas, which worked fine)
1 cup grated unsweetened coconut
1 tablespoon canola oil
1 teaspoon cumin seeds
1 tablespoon brown mustard seeds

Soak orange lentils for 3 hours in tepid water. Drain and rinse until the water runs clear. Boil the orange lentils with the salt in about 4 cups of water- then reduce heat and cook on medium low for 40 minutes, or until they are tender. Once the lentils are soft, mash them in the pot so that they become more of a sauce-like consistency.
Add the spinach, mix well, and adjust the salt to taste.
In a small skillet, dry roast the chilis with the yellow lentils. The chilis will give off some heat, so make sure that your kids aren't in the room. Toast until slightly brown, moving the skillet frequently. This will take about two minutes.
In a blender or food processor, grind the toasted chilis and yellow lentils--add the coconut and blend some more. Add this mixture to the soup and cook it all together for a few minutes.
Heat up your little skillet again. Heat the canola oil, then add the cumin and mustard seeds. When the seeds start to pop and smell good, pour the little mixture into the soup. Serve immediately, with flatbread.


Just because I want to, I'm going to give this one to you verbatim. With apologies and gratitude to Harper Perennial--you know we food bloggers are always breaking the rules. I am so so sorry, but my words just won't do here. And so, from "The Case of the Mysterious Flatbread":

(Laurie Colwin's Flatbread, from More Home Cooking)

"Here then, for anyone who wants to make a delicious, exotic, and really easy bread (or an attractive pile of biscuits) is the method for Flatbread.
Stir together 2 tablespoons of warm water with a teaspoon of yeast and 2 tablespoons of yogurt. Mix in 1/3 cup of flour and 2 teaspoons of sugar. Leave overnight, or all morning, or for 3 hours in an unlit oven. The mix will bubble nicely until you are ready for it.
In a bowl combine 2 cups of flour, 2 teaspoons of sea salt and 1 tablespoon of black onions seed (these are called kalaunji) [also Nigella! that's me chiming in]. Add the yogurt starter and 1 cup of warm water. Knead the dough on a floured board, kneading in an additional 3/4 cup flour, and leave it to rise for 2 hours.
When the dough has doubled in bulk, divide it in half. Heat the griddle until it is hot. Flatten the dough as for pizza or roll it out and turn it onto the griddle. You want the bread to toast but not to burn. When it is brown and speckled on both sides (this takes about 5 minutes), reduce the heat to low and continue to cook it for about 10 minutes. Tap it to see if it sounds hollow.
The bread is flat and spongy and goes with anything you can think of. And it takes less than a half hour of hands-on work to produce. Furthermore, flatbread proves that we are all brothers and sisters. It is a cross between a Scottish griddle scone, and English muffin, a Russian bialy, an Italian focaccia and a Navajo fry bread--a whole United Nations in one loaf, and cheap and delicious besides."

Thank you Laurie.

And we are not alone today--the spinach is flying around here. What a group to share the kitchen!


And you? I'm feeling pretty hungry if you've got an extra seat in your kitchen.

What's cooking?

Sunday, June 6, 2010

how to freeze spinach

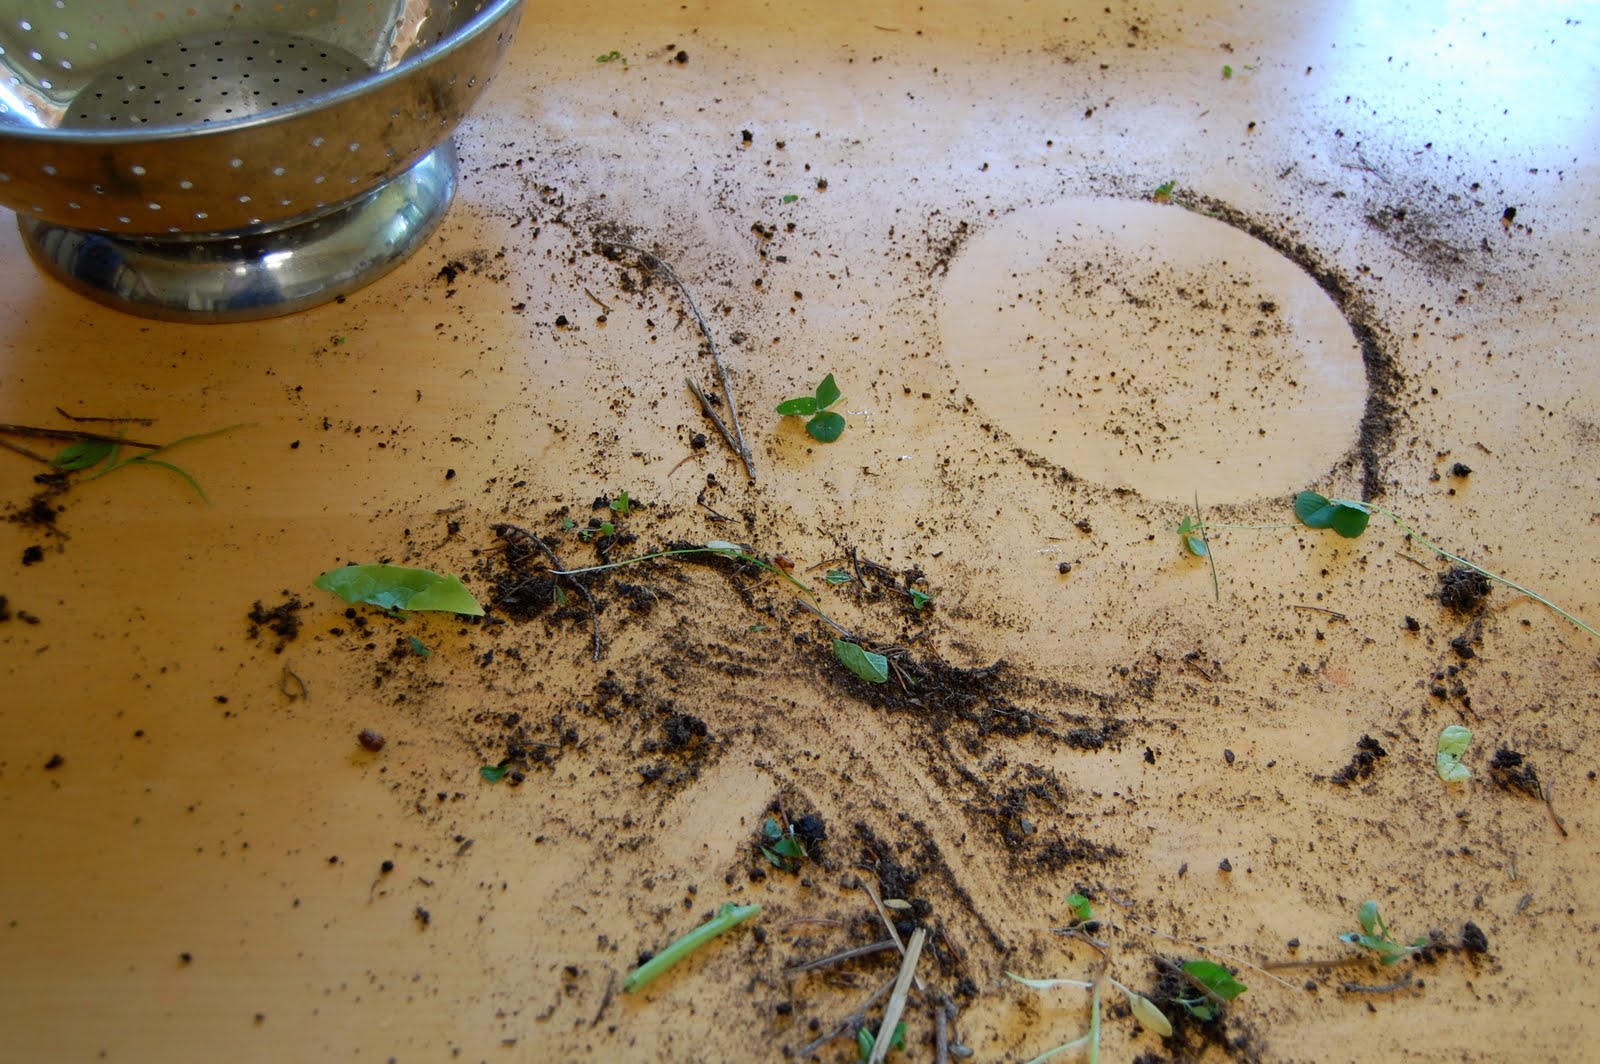
I'm not going to try to hide this from you. The other day, I ripped out a whole bed of spinach. It was a lot of spinach, and I froze it all, and the whole process from first pick to last sweep in the kitchen took me all of two and a half hours. There were several necessary tasks that I was avoiding at the time, and all the while, I insisted to myself that the world would stand still for my spinach processing- that this was the most important thing I could possibly be doing with my afternoon. Squirreling away greens for my family that I would pull out in the dead of winter? Nothing could trump that one. When I finally emerged with dirt on my face and spinach roots in my hair, I had exactly 3 half-pound bags of spinach to stack in my freezer.

Yup, I'd be shying away from the obvious if I didn't admit that I was a bit looney to engage in the process at all.

Don't get me wrong- you absolutely want to start freezing greens, especially if you have a busting garden or you can't quite keep up with your farm share. In the winter, I assure you that you will take great joy at throwing your own kale-sicle into a pot of soup. We'll talk about the freezing of various greens over the coming weeks, but just so you're not dying of suspense, I'll tell you right now that you can freeze kale, swiss chard, mustard greens, collards- you name it. The method is pretty much the same with every green, but today we're just going to talk about spinach.

Are you ready for it? Would you like to get really dirty, bring a whole lot of crazy bugs into your kitchen, and then work for a couple of hours just so you can create a few satisfying bags of perfect green loveliness?


Me too! I love this stuff.

If your spinach is washed, and in neat bags from you farm share or the market, this whole process will much quicker and cleaner. But if there is anyone out there who, like me, has recently (or are procrastinating, and you need to do it today!) pulled out a bed of spinach that has just started to bolt, we're going to start at the beginning. So here, in just 13 easy steps...

How to Freeze Spinach

If the spinach is still in the ground:

1. Pick it! If it is getting too big and starting to flower, pull the whole plants out.
2. Separate the leaves from the stems. (Note: as my friend Jen reminded me, you don't have to make a big mess. You can shear the leaves off the plants and pull out the roots later, or just let them decompose in the soil) Fill every bowl and pot in your house with the leaves. Compost the stems.
3. Wash the leaves. Fill the bowls with water, and add a drop of white or apple cider vinegar to the water. Swish around, and then drain.
4. Repeat step three. Remove the snails that have sped up the sides of the bowls in panic.
5. If your spinach was especially dirty, repeat again.

If your spinach is already washed by some saintly farmer, start here:

6. Bring a large pot of water to boil.
7. Fill a large bowl (if you have any left that aren't filled with spinach) with ice water. Place nearby to the heating pot on the stove.
8. When the water is boiling, put about 4 large handfuls of clean spinach leaves into the boiling water. Keep them submerged for about 15 seconds.
9. With tongs or a slotted spoon, remove the spinach from the boiling water, and submerge into the ice water. Keep submerged in ice water for 10 seconds.


10. Remove the spinach from the ice water, squeezing out excess water. Put the spinach onto a cutting board.

11. Chop roughly.
12. Choose your portions according to how much spinach you like to use at once. Perhaps you have a favorite recipe that calls for 4 cups? Then fill your bag with four cups. I like to fill my bags with 8 ounces of chopped spinach. Whatever your preference, put your spinach into freezer bags, and label them with the amount that you chose.
13. Shake the contents to make a nice flat bag. It has taken me years to really learn this trick from my friend, Jen, who freezes enough food to feed us all. If you make a flat bag, then the bags will stack up in your freezer.


Satisfying, isn't it? Yes, an entire bed of spinach turned into 3 tiny freezer bags worth. Yes, there are still earwigs in my kitchen. But still- still! You know where I'm coming from right? There are three perfect little blocks of spinach now waiting to nourish my children through the long dark winter. And with a few more afternoons like this one, the stack will grow! In these next months, we'll fill up that unsung hero of home food preservation, the freezer... one slightly looney afternoon at a time.

Thursday, April 8, 2010

spinach ricotta pie

For some reason, pie crust has been coming up a lot lately.
"I just can't do pie crust!"
I kid you not. I have heard this four times in the last week.

I wouldn't call myself a pie crust master (if only I were master of anything except this mess!), but I no longer get an anxious clench in my stomach when I pull out my rolling pin. And I'd say maybe 4 times out of 5, the crust is damn good. So, I'm getting there. Those other 1 out of 5 crusts are usually hard as a rock, but we won't talk about those, at least not today.

Some people who don't do the pie crust thing just avoid the whole topic altogether. They say they like frittatas better than quiches anyway, and they make crisps instead of pies. I have certainly gone this route, but, like I said, the rolling pin and I are getting to be better friends.

But then there is the other option. There is, ahem, the frozen pie crust.
As I've mentioned here before, this is the crust on which I was raised. My mother's brand of choice was, and still is, called Orenoke. To this day, I hand her a piece of pie made in my own crust, and the best I can get out of her is "yeah, it's pretty good."
I guess I can't really blame her. She just loves that Orenoke pie crust.


Honestly, I think if frozen pie crust is your thing, use it! I say that guilt and the kitchen don't mix. We do what we can, and if it works, then amen to that.
But for those of you who might like to try their hand at pie crust again, or for the first time, I'm thinking we should do a little work together here. Yeah? Maybe next week, after those peas are in the ground? It's supposed to rain a little bit here, and I'm thinking that will be a good time. I could use a date with that rolling pin.

I've got a couple of tricks, and I'm guessing you might too. Will you help out? Together, we might just master this thing.

So what do you think? Are you in? It might be good to get a handle on it before berry season comes around. When there are that many strawberries, it's good to have options.

Just to get started, I've got a pie for you today. This was one of my mother's favorites when I was growing up, and she brought it to every single potluck dinner that I can remember. Of course, the crust was always Orenoke. So, if you want to wait until our little pie crust session to get the rolling pin out, go ahead and use that frozen pie crust. My mother would say it's better that way, anyway.

Spinach Ricotta Pie
adapted from Mollie Katzen, Moosewood Cookbook

1 recipe all-butter pie crust, single crust, or a frozen pie crust, or what have you
1 pound ricotta cheese
3 beaten eggs
1/2 pound chopped spinach, fresh or frozen
1 small, diced onion
3 tablespoons flour
1/2 cup grated cheddar cheese
dash nutmeg
paprika, for the top
salt and pepper
1 tablespoon butter
1 cup sour cream

Prepare the pie crust and lay into a buttered 9-inch pie pan. Preheat the oven to 375 degrees. In a small skillet or sautee pan, melt the butter. Add the onion. When the onion is translucent, add the spinach (if it is frozen, you can put it right in there). Cook for about 2 minutes over medium heat, stirring frequently. Add a pinch of salt and a dash of pepper. Remove from heat.
In a medium mixing bowl, combine the spinach mixture, ricotta, eggs, flour, cheese and nutmeg. Spread into unbaked pie shell.
Top with one cup sour cream, spread to the edges of the crust with a rubber spatula. Top with a generous sprinkling of paprika.

Bake for 40-50 minutes.

Saturday, March 28, 2009

The Daring Lasagne


OK, let me just say here once and for all that I am one daring kitchen ninja. Over and over I takn the daring baker's challenge like a good little blogger, and then I make it at the last minute, inevitably and usually when I am about to throw a party. It makes sense right? I mean, I need people to eat the challenge after I make it, so I invite them over. But I always tend to get in a little over my head.
This month was no exception. Posting date (for which I am late, sorry a million times) was Joey's birthday, and when I discovered that the challenge was for a traditional Northern Italian lasagne, I knew that the stars were aligned. Because the thing is, Joey feels kind of spiritual about lasagne. And he was going to be thirty and it was all going to be perfect.
But you hear the tone of doom in my voice, right? Because then I decided to surprise him with some friends from out of town, and before I know it, it's Friday morning, and I'm making two traditional Northern Italian lasagnes, and two cheesecakes, and four loads of laundry, and lots of table setting, and I'm making up new cocktails and drinking them too just to calm my speeding heart as I run, yes run around the house.
But of all of these things, the lasagne is the thing that I am most cocky about, because although making fresh pasta might be intimidating for some people, I make it a lot, and I am not scared in the least.
I have this fabulous little crank pasta maker that my friend Eilen gave me for my birthday last year, and it's so fun and easy, I make pasta once a week. So why should I be scared?
OK, I'll tell you why.
1. I am throwing a suprise dinner and making lasagne at the last minute. Disastrous already.
2. This lasagne involves a ragu sauce which takes a lot of time, in fact, about as many hours as there are kinds of meat involved.

3. The lasagne uses a bechemel sauce instead of ricotta, and I tend to have a hard time thickening bechemel sauce. This is one irrational reason (among several rational ones) that I want to go to culinary school.
4. Two words: spinach pasta.

Spinach pasta is different than non spinach pasta. The moisture content is not what I'm used to, but somehow, I wrestled it into a ball.

And this brings us to 5:15 last night, a half an hour before Joey is supposed to arrive. My kids are crying for some reason beyond me. My ten-year-old sister, who I have put in charge of the girls while I make this lasagne, is finally shouting "Go on cry! Cry about how bad your life is!" This stops the crying, and my sister is my hero. I am diligently trying to run the little balls of spinach pasta through the machine, and I swear the thing is pooping out these little sticky balls of stuff, and it's all just falling apart. This has never happened to me. And I have made a double batch of spinach noodles and there is mushy spinach dough everywhere. And then I start to panic. My friend Meg arrives, and I'm holding back the tears and I'm thinking maybe I should just order pizza. And she says, screw the pasta maker, use the rolling pin. This works better, and I'm assembling as I go. I've made lasagne with fresh noodles before, and I always skip the drying and cooking of the noodles and I like the result. So I'm assembling, and my bechemel is pretty runny, and the ragu is all milky, and the noodles are all holey and awful looking, and this whole thing is just, well, as Joey would call it, "lasagne fail".
I'm not giving up now though, and I bake the thing, and people are arriving and I'm now really drinking because boy do I need it, and I'm just trying not to think about the horrible disaster in the oven.
Everything else is going well, although the white bean stew burns and I drop one of the cheesecakes on the floor, but it ends up on the right side.
Joey comes, and everyone says surprise and I'm still running around and I take the lasagnes out of the oven.
And they don't look so bad, although we're definitely going to need bowls. I have created a new dish: lasagne soup.
But then something miraculous happens. It sets up. And awestruck, I put it on a plate.

And it's friggin' delicious. I mean so good, every part of it. A masterpiece.
Told you I was a kitchen ninja. Did you really think it was going to end poorly?

And you too can be a kitchen ninja. And make sure you check out all the exciting accounts of daring lasagnes from the fabulous daring bakers. Here are the details:

The March 2009 challenge is hosted by Mary of Beans and Caviar, Melinda of Melbourne Larder and Enza of Io Da Grande. They have chosen Lasagne of Emilia-Romagna from The Splendid Table by Lynne Rossetto Kasper as the challenge.


Lasagne of Emilia-Romagna (Lasagne Verdi al Forno)
(Serves 8 to 10 as a first course, 6 to 8 as a main dish)

Preparation Time: 15 minutes to assemble and 40 minutes cooking time

10 quarts (9 litres) salted water
1 recipe Spinach Pasta cut for lasagna (recipe follows)#1
1 recipe Bechamel Sauce (recipe follows)#2
1 recipe Country Style Ragu (recipe follows)#3
1 cup (4 ounces/125g) freshly grated Parmigiano-Reggiano

Method
Working Ahead:
The ragu and the béchamel sauce can be made up to three days ahead. The ragu can also be frozen for up to one month. The pasta can be rolled out, cut and dried up to 24 hours before cooking. The assembled lasagne can wait at room temperature (20 degrees Celsius/68 degrees Fahrenheit) about 1 hour before baking. Do not refrigerate it before baking, as the topping of béchamel and cheese will overcook by the time the center is hot.

Assembling the Ingredients:
Have all the sauces, rewarmed gently over a medium heat, and the pasta at hand. Have a large perforated skimmer and a large bowl of cold water next to the stove. Spread a double thickness of paper towels over a large counter space. Preheat the oven to 350 degrees Fahrenheit (180 degrees Celsius). Oil or butter a 3 quart (approx 3 litre) shallow baking dish.

Cooking the Pasta: (note: I didn't do this)
Bring the salted water to a boil. Drop about four pieces of pasta in the water at a time. Cook about 2 minutes. If you are using dried pasta, cook about 4 minutes, taste, and cook longer if necessary. The pasta will continue cooking during baking, so make sure it is only barely tender. Lift the lasagne from the water with a skimmer, drain, and then slip into the bowl of cold water to stop cooking. When cool, lift out and dry on the paper towels. Repeat until all the pasta is cooked.

Assembling the Lasagne:
Spread a thin layer of béchamel over the bottom of the baking dish. Arrange a layer of about four overlapping sheets of pasta over the béchamel. Spread a thin layer of béchamel (about 3 or 4 spoonfuls) over the pasta, and then an equally thin layer of the ragu. Sprinkle with about 1&1/2 tablespoons of the béchamel and about 1/3 cup of the cheese. Repeat the layers until all ingredients are used, finishing with béchamel sauce and topping with a generous dusting of cheese.

Baking and Serving the Lasagne:
Cover the baking dish lightly with foil, taking care not to let it touch the top of the lasagne. Bake 40 minutes, or until almost heated through. Remove the foil and bake another 10 minutes, or until hot in the center (test by inserting a knife – if it comes out very warm, the dish is ready). Take care not to brown the cheese topping. It should be melted, creamy looking and barely tinged with a little gold. Turn off the oven, leave the door ajar and let the lasagne rest for about 10 minutes. Then serve. This is not a solid lasagne, but a moist one that slips a bit when it is cut and served.

#1 Spinach Egg Pasta (Pasta Verde)

Preparation: 45 minutes

Makes enough for 6 to 8 first course servings or 4 to 6 main course servings, equivalent to 1 pound (450g) dried boxed pasta.

2 jumbo eggs (2 ounces/60g or more) (note, I used four eggs, but this number with vary greatly depending on the size of the eggs and the humidity of the day)
10 ounces (300g) fresh spinach, rinsed dry, and finely chopped; or 6 ounces (170g) frozen chopped spinach, defrosted and squeezed dry
3&1/2 cups (14 ounces/400g) all purpose unbleached (plain) flour (organic stone ground preferred)

Working by Hand:

Equipment

A roomy work surface, 24 to 30 inches deep by 30 to 36 inches (60cm to 77cm deep by 60cm to 92cm). Any smooth surface will do, but marble cools dough slightly, making it less flexible than desired.

A pastry scraper and a small wooden spoon for blending the dough.

A wooden dowel-style rolling pin. In Italy, pasta makers use one about 35 inches long and 2 inches thick (89cm long and 5cm thick). The shorter American-style pin with handles at either end can be used, but the longer it is, the easier it is to roll the pasta.
Note: although it is not traditional, Enza has successfully made pasta with a marble rolling pin, and this can be substituted for the wooden pin, if you have one.

Plastic wrap to wrap the resting dough and to cover rolled-out pasta waiting to be filled. It protects the pasta from drying out too quickly.

A sharp chef’s knife for cutting pasta sheets.

Cloth-covered chair backs, broom handles, or specially designed pasta racks found in cookware shops for draping the pasta.

Mixing the dough:
Mound the flour in the center of your work surface and make a well in the middle. Add the eggs and spinach. Use a wooden spoon to beat together the eggs and spinach. Then gradually start incorporating shallow scrapings of flour from the sides of the well into the liquid. As you work more and more flour into the liquid, the well’s sides may collapse. Use a pastry scraper to keep the liquids from running off and to incorporate the last bits of flour into the dough. Don’t worry if it looks like a hopelessly rough and messy lump.

Kneading:
With the aid of the scraper to scoop up unruly pieces, start kneading the dough. Once it becomes a cohesive mass, use the scraper to remove any bits of hard flour on the work surface – these will make the dough lumpy. Knead the dough for about 3 minutes. Its consistency should be elastic and a little sticky. If it is too sticky to move easily, knead in a few more tablespoons of flour. Continue kneading about 10 minutes, or until the dough has become satiny, smooth, and very elastic. It will feel alive under your hands. Do not shortcut this step. Wrap the dough in plastic wrap, and let it relax at room temperature 30 minutes to 3 hours.

Stretching and Thinning:
If using an extra-long rolling pin work with half the dough at a time. With a regular-length rolling pin, roll out a quarter of the dough at a time and keep the rest of the dough wrapped. Lightly sprinkle a large work surface with flour. The idea is to stretch the dough rather than press down and push it. Shape it into a ball and begin rolling out to form a circle, frequently turning the disc of dough a quarter turn. As it thins outs, start rolling the disc back on the pin a quarter of the way toward the center and stretching it gently sideways by running the palms of your hands over the rolled-up dough from the center of the pin outward. Unroll, turn the disc a quarter turn, and repeat. Do twice more.

Stretch and even out the center of the disc by rolling the dough a quarter of the way back on the pin. Then gently push the rolling pin away from you with one hand while holding the sheet in place on the work surface with the other hand. Repeat three more times, turning the dough a quarter turn each time.

Repeat the two processes as the disc becomes larger and thinner. The goal is a sheet of even thickness. For lasagne, the sheet should be so thin that you can clearly see your hand through it and see colours. Cut into rectangles about 4 by 8 inches (10 x 20 cm). Note: Enza says that transparency is a crucial element of lasagne pasta and the dough should be rolled as thinly as possible. She says this is why her housekeeper has such strong arms!

Dry the pasta at room temperature and store in a sealed container or bag.

#2 Bechamel

Preparation Time: 15 minutes

4 tablespoons (2 ounces/60g) unsalted butter
4 tablespoons (2 ounces/60g) all purpose unbleached (plain) flour, organic stone ground preferred
2&2/3 cups (approx 570ml) milk
Salt and freshly ground pepper to taste
Freshly grated nutmeg to taste

Using a medium-sized saucepan, melt the butter over low to medium heat. Sift over the flour, whisk until smooth, and then stir (without stopping) for about 3 minutes. Whisk in the milk a little at a time and keep the mixture smooth. Bring to a slow simmer, and stir 3 to 4 minutes, or until the sauce thickens. Cook, stirring, for about 5 minutes, until the sauce thickens. Season with salt, pepper, and a hint of nutmeg.

#3 Country Style Ragu’ (Ragu alla Contadina)

Preparation Time: Ingredient Preparation Time 30 minutes and Cooking time 2 hours

Makes enough sauce for 1 recipe fresh pasta or 1 pound/450g dried pasta)

3 tablespoons extra virgin olive oil (45 mL)
2 ounces/60g pancetta, finely chopped
1 medium onion, minced
1 medium stalk celery with leaves, minced
1 small carrot, minced
4 ounces/125g boneless veal shoulder or round
4 ounces/125g pork loin, trimmed of fat, or 4 ounces/125g mild Italian sausage (made without fennel)
8 ounces/250g beef skirt steak, hanging tender, or boneless chuck blade or chuck center cut (in order of preference)
1 ounce/30g thinly sliced Prosciutto di Parma
2/3 cup (5 ounces/160ml) dry red wine
1 &1/2 cups (12 ounces/375ml) chicken or beef stock (homemade if possible)
2 cups (16 ounces/500ml) milk
3 canned plum tomatoes, drained
Salt and freshly ground black pepper to taste

Working Ahead:
The ragu can be made 3 days ahead. Cover and refrigerate. It also freezes well for up to 1 month. Skim the fat from the ragu’ before using it.

Browning the Ragu Base:
Heat the olive oil in a 12 inch (30cm) skillet (frying pan) over medium-high heat. Have a large saucepan handy to use once browning is complete. Add the pancetta and minced vegetables and sauté, stirring frequently with a wooden spoon, 10 minutes, or until the onions barely begin to color. Coarsely grind all the meats together, including the prosciutto, in a food processor or meat grinder. Stir into the pan and slowly brown over medium heat. First the meats will give off a liquid and turn dull grey but, as the liquid evaporates, browning will begin. Stir often, scooping under the meats with the wooden spatula. Protect the brown glaze forming on the bottom of the pan by turning the heat down. Cook 15 minutes, or until the meats are a deep brown. Turn the contents of the skillet into a strainer and shake out the fat. Turn them into the saucepan and set over medium heat.

Reducing and Simmering: Add the wine to the skillet, lowering the heat so the sauce bubbles quietly. Stir occasionally until the wine has reduced by half, about 3 minutes. Scrape up the brown glaze as the wine bubbles. Then pour the reduced wine into the saucepan and set the skillet aside.

Stir ½ cup stock into the saucepan and let it bubble slowly, 10 minutes, or until totally evaporated. Repeat with another ½ cup stock. Stir in the last 1/2 cup stock along with the milk. Adjust heat so the liquid bubbles very slowly. Partially cover the pot, and cook 1 hour. Stir frequently to check for sticking.

Add the tomatoes, crushing them as they go into the pot. Cook uncovered, at a very slow bubble for another 45 minutes, or until the sauce resembles a thick, meaty stew. Season with salt and pepper.